intelliJ创建spring项目
今天下载了个intelliJ试着用下。官网有30天试用的Ultimate版本和免费的Community版本,先下载了Community Editor,结果发现没有application service功能,无法使用tomcat,果断换Ultimate Editor,找了个激活码激活。
下载链接:http://www.jetbrains.com/idea/
下载安装打开,界面风格类似rubyMine,自从用过rubyMine之后一直嫌弃eclipse的界面,看着这个感觉爽多了。
接下来开始试着创建Spring项目,先新建一个new project,左边选择spring,右边勾选spring mvc:
点击next,依次按提示完成创建
在项目上右键,选择open modules setting,参照以前eclipse下的spring项目建立以下目录结构: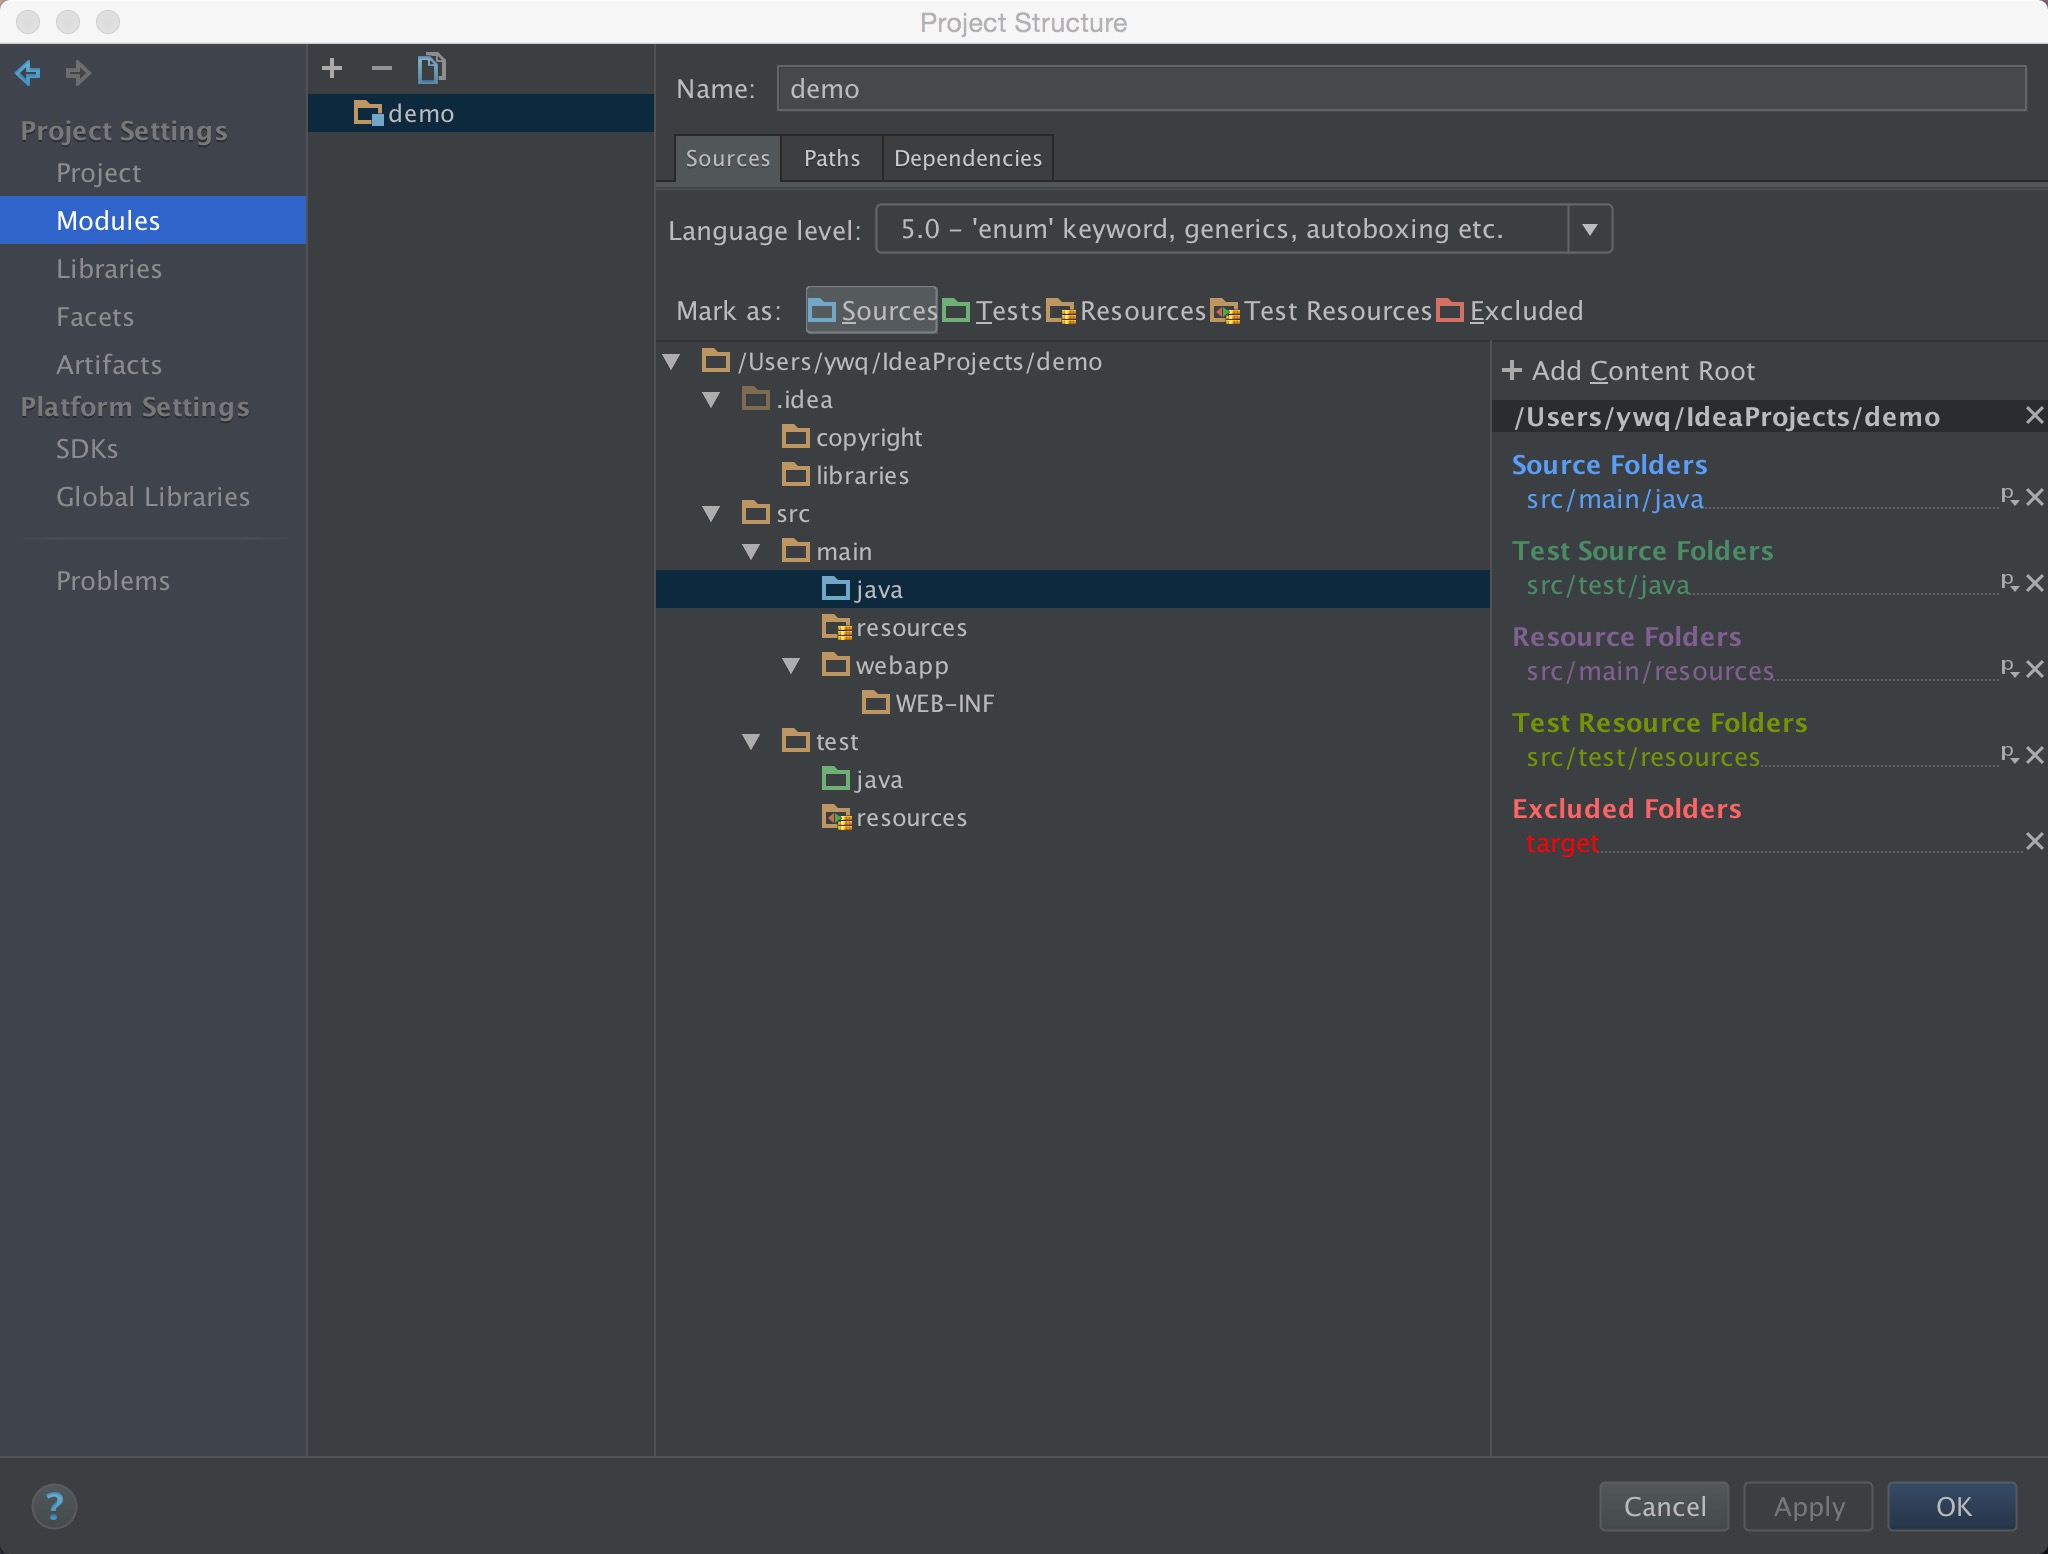
然后根据个人习惯修改配置,我的配置如下:1
2
3
4
5
6
7
8
9
10
11
12
13
14
15
16
17
18
19
20
21
22
23
24
25
26
27
28
29
30
31
32
33
34
35
36<?xml version="1.0" encoding="UTF-8"?>
<web-app xmlns="http://java.sun.com/xml/ns/javaee"
xmlns:xsi="http://www.w3.org/2001/XMLSchema-instance"
xsi:schemaLocation="http://java.sun.com/xml/ns/javaee http://java.sun.com/xml/ns/javaee/web-app_2_5.xsd"
xmlns:web="http://java.sun.com/xml/ns/javaee/web-app_2_5.xsd"
version="2.5">
<display-name>spring-web</display-name>
<context-param>
<param-name>contextConfigLocation</param-name>
<param-value>
classpath*:/applicationContext.xml
</param-value>
</context-param>
<listener>
<listener-class>
org.springframework.web.context.ContextLoaderListener
</listener-class>
</listener>
<servlet>
<servlet-name>springServlet</servlet-name>
<servlet-class>org.springframework.web.servlet.DispatcherServlet</servlet-class>
<init-param>
<param-name>contextConfigLocation</param-name>
<param-value>/WEB-INF/spring-mvc.xml</param-value>
</init-param>
<load-on-startup>1</load-on-startup>
</servlet>
<servlet-mapping>
<servlet-name>springServlet</servlet-name>
<url-pattern>/</url-pattern>
</servlet-mapping>
</web-app>
web.xml配置了applicationContext.xml和spring-mvc.xml两个文件,在src/main/resources目录下新建applicationContext.xml:1
2
3
4
5
6
7
8
9
10
11
12
13
14
15
16<?xml version="1.0" encoding="UTF-8"?>
<beans xmlns="http://www.springframework.org/schema/beans"
xmlns:xsi="http://www.w3.org/2001/XMLSchema-instance"
xmlns:context="http://www.springframework.org/schema/context"
xmlns:jee="http://www.springframework.org/schema/jee"
xmlns:tx="http://www.springframework.org/schema/tx"
xmlns:aop="http://www.springframework.org/schema/aop"
xsi:schemaLocation="
http://www.springframework.org/schema/beans http://www.springframework.org/schema/beans/spring-beans-4.0.xsd
http://www.springframework.org/schema/context http://www.springframework.org/schema/context/spring-context-4.0.xsd
http://www.springframework.org/schema/jee http://www.springframework.org/schema/jee/spring-jee-4.0.xsd
http://www.springframework.org/schema/tx http://www.springframework.org/schema/tx/spring-tx-4.0.xsd
http://www.springframework.org/schema/aop http://www.springframework.org/schema/aop/spring-aop-4.0.xsd "
default-lazy-init="true">
//your setting
</beans>
将src/main/webapp/WEB-INF目录下除web.xml的另一个xml文件rename为spring-mvc.xml(对应web.xml中DispatcherServlet的配置,不填默认为[servelet-name]-servlet.xml):1
2
3
4
5
6
7
8
9
10
11
12
13
14
15
16
17
18
19
20
21<?xml version="1.0" encoding="UTF-8"?>
<beans xmlns="http://www.springframework.org/schema/beans"
xmlns:xsi="http://www.w3.org/2001/XMLSchema-instance"
xmlns:context="http://www.springframework.org/schema/context"
xmlns:mvc="http://www.springframework.org/schema/mvc"
xsi:schemaLocation="
http://www.springframework.org/schema/beans http://www.springframework.org/schema/beans/spring-beans-4.0.xsd
http://www.springframework.org/schema/context http://www.springframework.org/schema/context/spring-context-4.0.xsd
http://www.springframework.org/schema/mvc http://www.springframework.org/schema/mvc/spring-mvc-4.0.xsd">
<context:component-scan base-package="com.climbran.webdemo.spring" />
<mvc:default-servlet-handler/>
<bean id="viewResolver" class="org.springframework.web.servlet.view.InternalResourceViewResolver">
<property name="prefix" value="/WEB-INF/views/" />
<property name="suffix" value=".jsp" />
<bean>
<mvc:annotation-driven/>
</beans>
再src/main/webapp/WEB-INF目录下新建pages文件夹rename为view(对应spring-mvc.xml文件中的配置)
